Building a chatbot from a knowledge base
Chatbots are an enjoyable and engaging way of user interaction in modern applications. Thanks to the advancements of large language models (LLMs), chatbots are now capable of generating natural and fluent conversations. However, one big challenge with LLMs is that they are frozen in time, meaning that they do not have any information about the world after their training. Their knowledge is limited to what they learned during training and the input they receive. When we have a large context or knowledge base, it is not possible to include all the information in the initial prompt and fine-tuning usually doesn't work very well in these scenarios. In this post, we will explore an innovative solution that combines a search algorithm with an LLM to overcome this limitation.
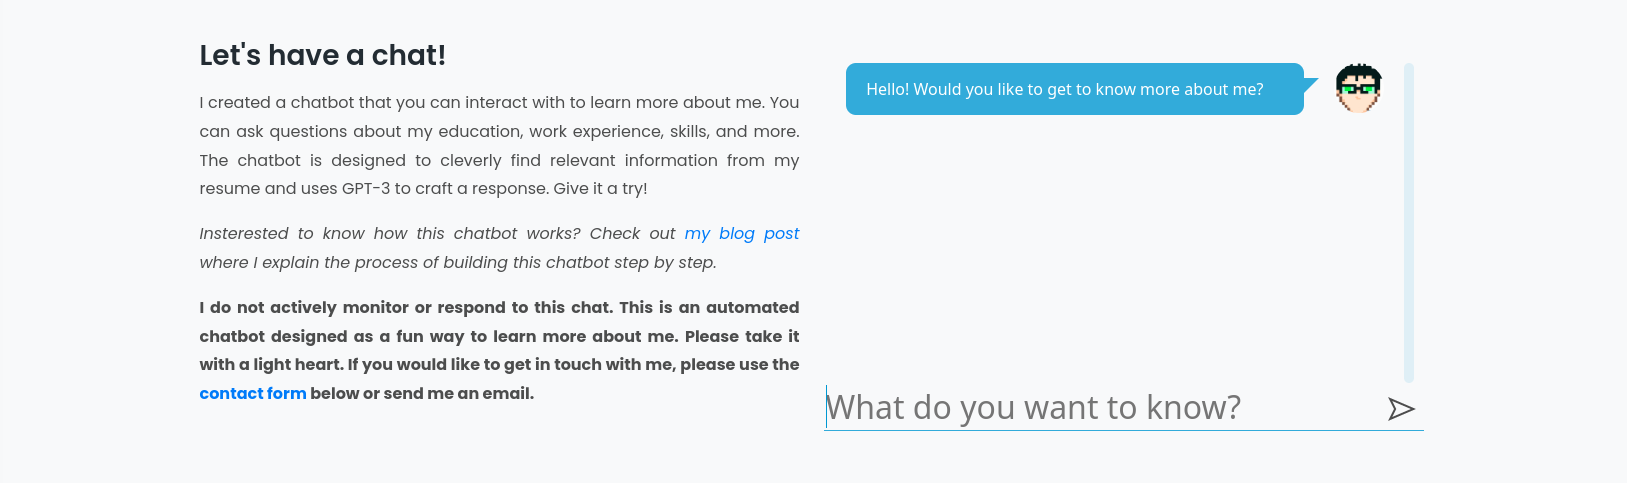
Follow this article to see how I created a chatbot based on my personal website data and deployed it as a fun way for users to learn more about me!
TLDR
In our chatbot's overall architecture, we construct a knowledge base and partition it into smaller sections. For each section, we compute embeddings and store them in a specialized vector database which allows us to query the embeddings using cosine similarity. When a user asks a question from the chatbot, we use the same model to embed the question and perform a cosine similarity search against our knowledge base to retrieve the most relevant sections related to the question. Finally, we feed both the question and the relevant context into an LLM to generate a polished response.
If you want to see the final results in action go to my website. With that being said, let's jump into the details!
Creating a knowledge base
But wait! What about my privacy? Is it okay to give my personal information to a third party like OpenAI or ChatGPT? Certainly not! But we are only using information that is publicly available on the internet. Most probably OpenAI already stored my website among the other million websites that they have in their dataset. However, keep in mind that you do not want to share anything personal or any information that you do not want to be publicized in your knowledge base. Even if you are not planning to deploy the chatbot publicly. Make sure to reaad the OpenAI's API data usage policies.
Now that we are aware of the privacy risks, we can go ahead and create our knowledge base. I store the information on my website as a JSON document. To conveniently convert this info to text I will use ChatGPT and ask it to convert my JSON into human readable text. This will improve the performance of our semantic search and leads to more accurate answers. Once I have all my information ready I store everything in a text file and separate the sections with three newline characters.
Implementing a semantic search algorithm
Since the context that we have is too large to be directly used in the chat input. I want to use a semantic search method to find the most relevant sections of the large knowledge base and use that in my chat message.
Note that with the newly released GPT-3.5-turbo-16 and GPT-4-32k models, the context length is significantly increased. However, I still prefer to use a search method because not only it is cheaper based on the API usage but also it is a scalable solution without needing to worry about the size of our knowledge base.
I am going to use OpenAI embeddings API to embed each subsection of my knowledge base. Let's jump right into the code! I will use Python for this initial step and then move into JavaScript when I am deploying the model.
Remember that we split our knowledge base into smaller sections and separated them using three newline characters. Now I need to open this file and generate the embeddings. Before doing so, let's create a new virtual environment and set up the necessary tools.
$ virtualenv env
$ source env/bin/activate
$ pip install pinecone-client openai numpy pandas scipy matplotlib plotly scikit-learn
Now into the Python code! Let's read the knowledge base text file and create a Pandas DataFrame from the data.
with open('data/all.txt') as f:
    data = f.read().split('\n\n\n')

df = pd.DataFrame({'text': data})
The next step is to generate the embeddings. For that, we use the openai python package which contains the necessary methods for this task.
import openai
from openai.embeddings_utils import get_embedding
import tqdm
import numpy as np

tqdm.tqdm.pandas()

openai.api_key = <your api key>

embeddings = df.text.progress_apply(lambda x: get_embedding(x, engine='text-embedding-ada-002'))
embeddings = np.array(embeddings.to_list())
As simple as that, we have the text embeddings! To find the most relevant article we should calculate the cosine similarity between the embedded search phrase and the embeddings we generated. Let's try with a sample question and see if the search is working as expected.
search = np.array(get_embedding("Have you completed any internships?", engine='text-embedding-ada-002'))
df['text'][search.reshape(1, -1).dot(embeddings.T).argmax()]
And... let's see the output!
"AI Education & Project Management Intern at Vector Institute:\nAs an AI Education & Project Management Intern at the Vector Institute in Toronto, Canada, I have been involved in various aspects of project execution. One of my main responsibilities is supporting projects through event planning and effective communication with stakeholders. Additionally, I had the opportunity to facilitate project management for three teams, each comprising 3-5 professionals, during Vector's three-day Causal Inference Lab. This experience allowed me to enhance my skills in guiding and coordinating team efforts. Moreover, I contributed to the design, development, and deployment of a Self-assessment platform, collaborating with a team of education specialists and interns. The platform was implemented using Javascript and VueJS. In my role, I also worked closely with instructors, teaching assistants, and team members to design curriculum, develop assignments, and deliver various courses and workshops on cutting-edge AI tools and models."
Surely, the algorithm was able to retrieve the most relevant part of the knowledge base considering our initial question about internships.
We don't want to directly respond with the retrieved text from the knowledge base but rather use this as input to our next stage to craft a message in response to our user. We will do that using OpenAI's chat completion APIs in JavaScript. But before that, let's save our knowledge base embeddings.
I am going to use Pinecone to persist the embeddings. Pinecone is a vector database specifically designed to handle vector data and can perform cosine similarity queries for us quickly. The starter version provides one index for free.
The following code block will create a new index (an index is somehow equivalent to a table in a traditional database) and inserts our embeddings into the index. Note that the upsert method does not accept numpy arrays directly and expects an id for each vector so I used a list comprehension to reformat the input.
import pinecone

index_name = "<pinecone index name>"
pinecone.init(api_key="<pinecone api key>", environment="<pinecone environment>")
pinecone.create_index(index_name, dimension=embeddings.shape[1], metric="cosine")
pinecone.Index(index_name).upsert(
    [(str(i+1), list(embedding)) for i, embedding in enumerate(list(embeddings))]
)
All of our embeddings are now stored in Pinecone and we can efficiently query the most similar sections of our knowledge base.
Since Pinecone can not store the full text of our knowledge base, we also need a traditional SQL database to store the IDs and the corresponding full text so that we can cross-reference this later. The following code will generate a SQL query to store all of the data.
with open('fill_knowledge.sql', 'w+') as f:
    f.write("INSERT INTO knowledge_base (id, text) VALUES\n")
    for idx, row in df.iterrows():
        escaped_text = row['text'].replace("\n", "\\n").replace("'", "''")
        f.write(f"  ({idx+1}, '{escaped_text}'),\n")
    f.write(";\n")
That's everything we have to do in Python, so let's dive into the backend API!
The backend API
My website is hosted on CloudFlare Pages and the backend is running using CloudFlare Functions which is a serverless JavaScript Function as a Service (FaaS) platform. To keep everything consistent, I implement the chatbot backend in JavaScript and use Functions to serve it. For the SQL database, I am using CloudFlare D1, which is a serverless SQLite database.
The first step is to embed the user input, and for that, I will use the embeddings API again. This time, it will be a bit different since we are using js and we need to call the API directly. The following function will call the embeddings endpoint and retrieve the embeddings. I tried to keep the function name and inputs consistent with what we had in Python.
const get_embedding = async (text, engine) => {
  const apiRequest = new Request("https://api.openai.com/v1/embeddings", {
    method: "POST",
    body: JSON.stringify({
      input: text,
      model: engine,
    }),
    headers: {
      "Content-Type": "application/json",
      Authorization: `Bearer ${OPENAI_API_KEY}`,
    },
  });

  const apiResponse = await fetch(apiRequest);

  if (apiResponse.status !== 200) {
    console.log(apiResponse);
    throw new Error("Embeddings API Error.");
  }

  return (await apiResponse.json()).data[0].embedding;
};
Now that we have the embedding of the user's query, we need to apply our semantic search method to find the relevant context from our knowledge base. This is where Pinecone really shines as it can do that for us efficiently with a single API call. Remember that we have already stored our knowledge base embeddings in Pinecone in the last stage using Python. Now, we should send the embedded user query and receive the id of the context which is semantically closest to the query. Following the Pinecone API documentation, I came up with the following function to do that. This function inputs the embedding vector and returns the ids of the top_k matches.
const query_knowledge_base = async (vector, top_k = 1) => {
  const apiRequest = new Request(`${PINECONE_BASE_URL}/query`, {
    method: "POST",
    body: JSON.stringify({
      vector,
      top_k,
      includeValues: false,
    }),
    headers: {
      "Content-Type": "application/json",
      "Api-Key": PINECONE_API_KEY,
    },
  });

  const apiResponse = await fetch(apiRequest);

  if (apiResponse.status !== 200) {
    console.log(apiResponse);
    throw new Error("Pinecone Query API Error.");
  }

  return (await apiResponse.json()).matches.map((m) => m.id);
};
Now that we have our document ids, we need to look up in our SQL database to get the full text of each document and provide this context in the next step which is the chat completion. Let's query our D1 database and retrieve the corresponding text.
const context_ids = await query_knowledge_base(last_message_embedding, 3);
const { results } = await context.env.DB.prepare(
    "SELECT * FROM knowledge_base WHERE id IN (?)"
)
  .bind(context_ids.join(","))
  .all();
const context_texts = results.map((row) => row.text);
At this stage, we have the user query, conversation history, and the relevant context from our knowledge base. It is time to compile all this information together and prepare it in a format that we can input to OpenAI's chat completion API. The API expects us to send the whole conversation as JSON formatted string which start with a system message. The system message defines the assistant's role, the user message is what the user asks, and the assistant message is the AI's response. This format helps provide context and guide the model's response. After playing around and experimenting with different system messages and prompts, I ended up using the following as my system message and prompt.
You are AmirBot. A bot that can answer questions about Amir. User can only ask you about Amir's career and hobbies. You do not respond to personal questions. You will not respond to any other queries unrelated to Amir's professional resume. Use the given context in the message to answer the questions.
Answer the question, if the question is unrelated based on the system message, say "I can't answer this question.". Use the context to find relevant information. If the context is not relevant to the question, say "I don't know.". Context: ${context} \n\n ---\n\n Question: ${last_message}\n Answer:
It is now only a matter of JSON formatting and an API call with the messages to get the response. We need two more functions to complete this task. One to do the formatting and the other for the API call. Finally, we need to put everything together to have a fully working chatbot! To keep this article short I won't go into the details of this stage as it is pretty straightforward. You can have a look at the completed script here. Let's move into the last part which is the user interface and website integration.
The UI
Let's dive into creating a UI for our newly created chatbot! Since I want to use this bot in my website, I will implement the UI using HTML, CSS, and JavaScript and then add it as a part of my website.
Before starting any part of the project, I like to do my research and find existing libraries and snippets that can speed up my work. For this chatbot UI, I found this CodePen which I really liked. I think this is a good starting point for our chatbot UI. I am going to customize it based on my liking and preferences.
First things first, I want to create an Avatar. Since we are developing an AI chatbot, why not ask an AI to generate a cool avatar for us! Let's head over to DALL.E 2 on the OpenAI platform and ask it to generate an avatar. The prompt that I am going to use is "A programmer chatbot avatar pixel art" and Voila! we have a cool avatar to use!
Next, I will change the color scheme and make some improvements like adding a new send button in the text input. You can see the final results here.

The HTML and CSS code for the UI is pretty straightforward and I will not go into the details. If you would like to see the code that I ended up with, you find it here.
The last step is to connect our chatbot UI to the chat API we developed earlier. So let's dive into that! To allow the bot to recall previous messages, we need to collect all of the messages that we have in our chat thread. We can do so by getting all of the li elements within our chatbox and reading the innerHTML attribute. The following code block does that.
const chatThread = document.getElementById("chat-thread");
const conversation = Array.from(chatThread.children).map((c) => c.innerHTML);
Now that we have all of the conversation messages we need to send this to our backend API to be processed. The following function will send a POST request to our /chat endpoint which we defined earlier and return the results.
function fetchResponse(conversation) {
  return new Promise(async (resolve, reject) => {
    try {
      const response = await fetch("/chat", {
        method: "POST",
        headers: {
          "Content-Type": "application/json",
        },
        body: JSON.stringify(conversation),
      });

      const result = await response.json();
      resolve(result);
    } catch (error) {
      reject(error);
    }
  });
}
The main part of the work is done now. We just have to make sure that the user can not send multiple messages at the same time and show the server response in our chat interface. I will not go into those details but encourage you to have a look at the final JS source code of the chat UI.
We now have a fully working chatbot based on a large knowledge base! The chatbot is able to search through its knowledge base and retrieve related information and then frame it in a nicely crafted message using GPT. However, before deploying this bot into production, there are some things that we need to consider.
Production considerations
- The usage of APIs for a chatbot can quickly accumulate and become very expensive. You need to keep an eye out for the API costs and implement rate limits and other forms of restrictions to control potential abuses.
- Consider caching the common responses. If you cache previous user conversations and use a semantic similarity threshold you can skip the most expensive API call which is the chat completion.
- A big challenge with current LLMs is the problem of hallucination. Hallucination means that the model generates perfectly sensible sentences from false or non-existing facts. In our case we tried to control this behavior by directing the LLM to say "I dont know." when the given context does not back up the user's query. However, this method is still not 100% effective and this problem is still under active research.
- As mentioned earlier, you need to be very careful with your data and privacy. Read about the data privacy policies of the services that you use and investigate how you can protect your data.
- Monitor the conversations. It is not possible to read and monitor every single conversation with the chatbot. But try to monitor and review the conversations to see if there are any patterns of misuse.
- Get feedback from users. It is very important to understand where your chatbot fails or deviates from its main goal. The easiest way to spot such instances is through user feedback. Implement a simple feedback mechanism in the chat UI so that the users can give their feedback easily.